Canon FL lenses‚ produced from 1964-1979‚ represent a pivotal era in Canon’s lens development․ These
fully manual lenses offer a unique photographic experience‚ demanding precise technique and fostering a deeper
connection with the imaging process․ Understanding their operation requires delving into their historical context
and specific features‚ offering a rewarding challenge for photographers seeking a tactile and creative approach․
What is a Canon Manual FL Lens?
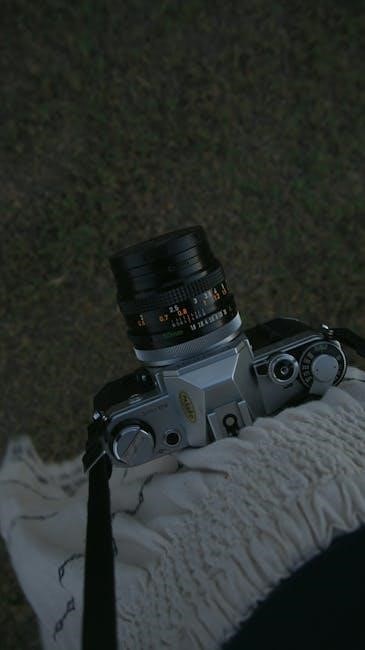
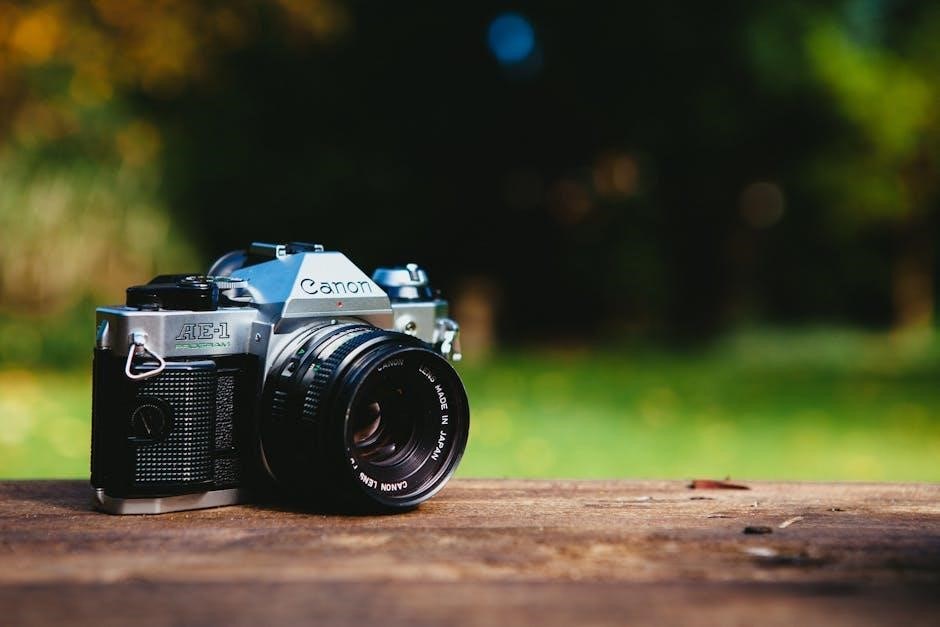
Canon FL lenses are a series of interchangeable lenses manufactured by Canon for their FD mount cameras between 1964 and 1979․ “FL” stands for “Fluorite‚” initially signifying the use of fluorite elements in some designs‚ though not all FL lenses contained them․ These lenses are
entirely manual‚ meaning aperture and focus are adjusted by hand‚ without electronic assistance from the camera body․ They predate the more sophisticated Canon New FD lenses‚ lacking the electronic communication features․
Consequently‚ using an FL lens requires a thorough understanding of exposure principles and precise focusing techniques‚ offering a distinctly analog photographic experience․
Historical Context of FL Lenses
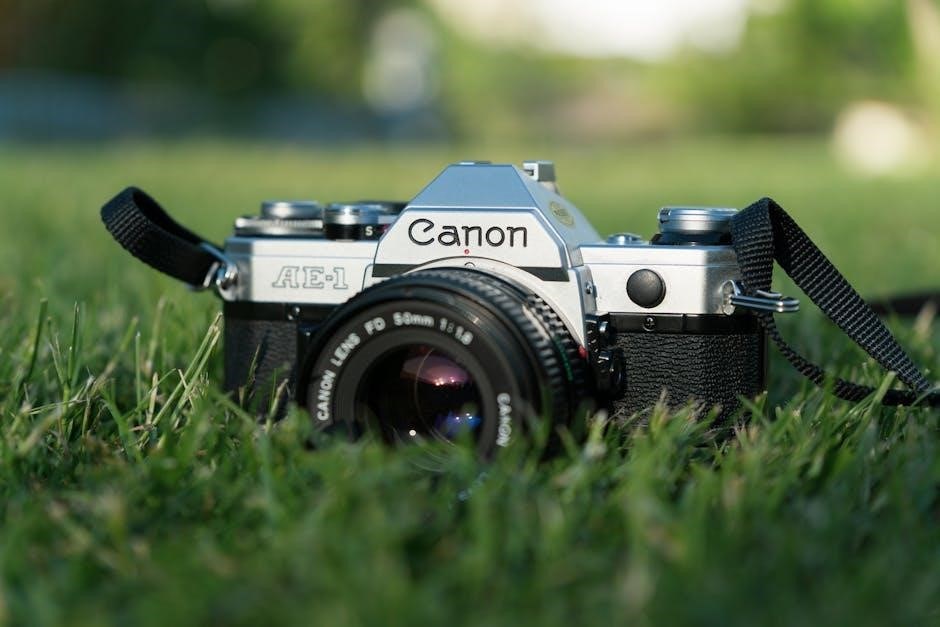
Canon’s FL lens series emerged as Canon transitioned from rangefinder to single-lens reflex (SLR) cameras․ Introduced with the Canon Pellix in 1964‚ they represented a significant leap in optical quality for the brand․ The FL mount was Canon’s first attempt at a standardized breech-lock lens mount․
These lenses were designed to compete with established brands like Nikon and Pentax․ Later‚ the New FD mount superseded the FL mount in 1971‚ offering electronic communication․ Despite being replaced‚ FL lenses remain sought after for their unique character and build quality․
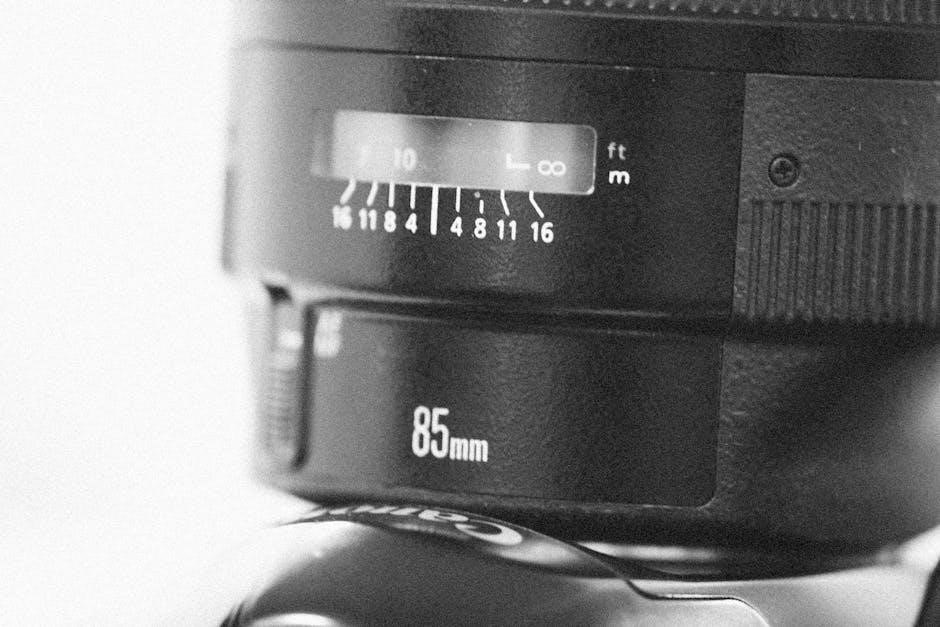
Understanding Lens Specifications
Decoding FL lens markings is crucial․ Key specs include focal length (in mm)‚ maximum aperture (f-stop)‚ and the FD mount designation․ These details define image characteristics․
Focal Length and Aperture
Focal length‚ measured in millimeters (mm)‚ dictates the angle of view and magnification․ A shorter focal length (e․g․‚ 28mm) captures a wider scene‚ ideal for landscapes‚ while a longer focal length (e․g․‚ 200mm) compresses perspective and magnifies distant subjects‚ suited for wildlife or portraits․ Aperture‚ denoted by f-numbers (e․g․‚ f/2․8‚ f/8)‚ controls the amount of light entering the lens and influences depth of field․
Lower f-numbers (like f/1․4) create shallow depth of field‚ blurring the background‚ while higher f-numbers (like f/16) yield greater depth of field‚ keeping more of the scene in focus․ Understanding the interplay between focal length and aperture is fundamental to achieving desired creative effects with your Canon FL lens․
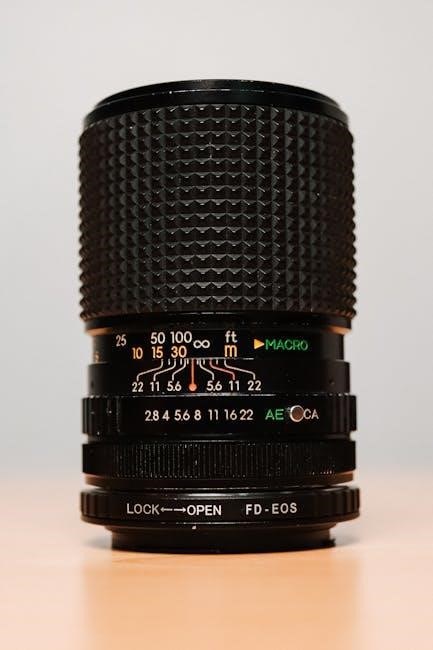
Lens Mount: Canon FD
Canon FD (Focusing Diameter) is the lens mount system utilized by Canon FL and subsequent FD lenses․ Introduced in 1971‚ it features a three-prong bayonet mount providing a secure connection to compatible Canon camera bodies․ The FD mount allows for full aperture metering‚ a significant advancement at the time․
It’s crucial to recognize that FD lenses are not directly compatible with Canon’s modern EF or RF mount cameras without an adapter․ The FD mount’s mechanical design and electrical contacts differ significantly‚ necessitating an adapter to bridge the gap and enable usage on newer systems․
Filter Thread Size
Canon FL lenses exhibit varying filter thread sizes depending on the specific focal length․ Common sizes include 49mm‚ 52mm‚ 55mm‚ 58mm‚ and 72mm․ Determining the correct size is essential for attaching filters like UV‚ polarizing‚ or neutral density filters to protect the lens element or achieve creative effects․
Always consult the lens’s markings or documentation to confirm the precise filter thread size before purchasing filters․ Using an incorrectly sized filter can damage the lens or prevent a secure attachment‚ compromising image quality and potentially causing vignetting․
Using Your Canon FL Lens
Successfully utilizing a Canon FL lens requires understanding its fully manual operation․ This includes precise aperture control‚ careful focusing‚ and utilizing external light metering for correct exposure․
Mounting the Lens to a Camera
Attaching your Canon FL lens to a compatible camera body—typically a Canon FD mount camera—involves aligning the red dot on the lens with the corresponding dot on the camera mount․ Gently push the lens into the mount and rotate it clockwise until it clicks securely into place․
Ensure a firm connection; a loose lens can cause focusing inaccuracies or damage․ When dismounting‚ press the lens release button on the camera body while rotating the lens counterclockwise․ Handle the lens carefully to avoid scratching or damaging the delicate mounting surfaces․ Proper mounting is crucial for optimal performance․
Setting Aperture and Focus
Adjusting the aperture on your Canon FL lens is done via the aperture ring‚ typically marked with f-stops (e․g․‚ f/2․8‚ f/4‚ f/8)․ Rotate the ring to select your desired aperture‚ controlling light intake and depth of field․ Focusing is achieved by rotating the focus ring until the image appears sharp in the viewfinder․
Smooth‚ deliberate movements are key for precise focusing․ Remember that FL lenses are fully manual‚ requiring careful observation and adjustment for optimal results․ Practice makes perfect when mastering manual focus and aperture control․
Metering with a Manual Lens
Since Canon FL lenses lack electronic contacts for direct metering with modern cameras‚ an external light meter is essential․ Handheld meters provide accurate readings‚ or you can utilize your camera’s built-in meter in “stop-down” mode‚ metering with the desired aperture set on the lens․
Alternatively‚ employ the “Sunny 16” rule as a starting point for estimating exposure․ Remember to adjust based on scene conditions․ Accurate metering is crucial for achieving properly exposed images with these manual lenses․

Focusing Techniques
Achieving sharp focus with Canon FL lenses relies entirely on manual operation․ Techniques like zone focusing and hyperfocal distance are invaluable for landscape and street photography‚ ensuring optimal sharpness․
Zone Focusing
Zone focusing is a powerful technique for street and candid photography with Canon FL lenses․ It involves pre-setting the focus to a specific distance‚ creating a “zone” of acceptable sharpness․ Estimate the closest distance you anticipate photographing‚ set your aperture for desired depth of field‚ and then simply compose and shoot․
This method eliminates the need to constantly refocus‚ allowing for quicker reactions to fleeting moments․ Practice judging distances accurately‚ and remember that a smaller aperture (higher f-number) will increase the depth of field‚ expanding your zone of sharpness․ It’s a fantastic way to capture dynamic scenes efficiently․
Hyperfocal Distance
Hyperfocal distance is the closest distance a lens can focus at while keeping everything from half that distance to infinity acceptably sharp․ Calculating it involves your lens’s focal length and aperture․ Utilizing this technique with your Canon FL lens maximizes depth of field‚ ensuring sharpness throughout the scene․
Online calculators simplify this process‚ or you can use a depth-of-field scale on some FL lenses․ Mastering hyperfocal distance is invaluable for landscape and architectural photography‚ guaranteeing optimal sharpness from foreground to background‚ even with manual focusing․
Precise Manual Focusing
Achieving sharp focus with a Canon FL lens demands practice and a keen eye․ Utilize the focusing ring on the lens barrel‚ observing the image through the viewfinder or live view (when adapted)․ Small adjustments are crucial; avoid overshooting the focus point․
Employ focusing aids like magnification or focus peaking (if your camera supports it)․ Consistent practice builds muscle memory‚ allowing for quicker and more accurate focusing․ Remember‚ precise manual focus unlocks the full potential of these classic lenses․
Exposure Control
Mastering exposure with an FL lens requires understanding the interplay of aperture‚ shutter speed‚ and ISO․ Utilize a handheld light meter or the “Sunny 16” rule for accurate settings․
Using a Light Meter
Employing a light meter is crucial for achieving correct exposure with your Canon FL lens‚ as the camera lacks built-in metering․ Set the meter to incident or reflected light mode‚ depending on the scene․ Take readings from representative areas‚ considering highlights and shadows․
Transfer the meter’s suggested aperture and shutter speed combination to your lens and camera․ Remember that the meter doesn’t “know” about creative intent; adjust settings accordingly․ Practice consistently to develop an intuitive understanding of light and exposure‚ refining your technique with each shot․
The Sunny 16 Rule
The Sunny 16 rule provides a quick estimation for exposure without a light meter‚ invaluable for Canon FL lens users․ On a sunny day‚ set your aperture to f/16 and your shutter speed to the reciprocal of your ISO (e․g․‚ ISO 100 = 1/100s)․
Adjust for different conditions: f/11 for slightly overcast‚ f/8 for overcast‚ and halve the shutter speed for each stop wider aperture․ This rule offers a starting point; always bracket your shots for optimal results and refine based on observation․
Understanding Exposure Triangle
The exposure triangle – aperture‚ shutter speed‚ and ISO – governs light reaching the sensor with your Canon FL lens․ Aperture controls depth of field; wider apertures (smaller f-number) create shallow depth‚ while narrower apertures (larger f-number) increase it․
Shutter speed dictates motion blur; faster speeds freeze action‚ slower speeds allow for motion blur․ ISO affects sensitivity to light; lower ISOs offer cleaner images‚ higher ISOs are useful in low light but introduce noise․ Mastering this balance is crucial․
Lens Care and Maintenance
Proper care extends the life of your Canon FL lens․ Regularly clean lens elements with a soft brush and lens solution‚ storing it protected from dust and humidity․
Cleaning the Lens Elements
Maintaining pristine lens elements is crucial for optimal image quality․ Begin by using a blower to remove loose dust and debris․ Follow this with a soft‚ clean lens brush‚ gently sweeping across the surface․ For stubborn smudges or fingerprints‚ apply a small amount of lens cleaning solution to a microfiber cloth – never directly onto the lens․
Wipe in a circular motion‚ starting from the center and moving outwards․ Avoid excessive pressure․ Inspect the lens under good light to ensure all residue is removed․ Regularly cleaning prevents buildup that can degrade image clarity and potentially damage the coating over time․
Storage and Protection
Proper storage safeguards your Canon FL lens against dust‚ moisture‚ and accidental damage․ When not in use‚ store the lens in a dedicated lens case or pouch‚ preferably with a desiccant pack to absorb humidity․ Avoid extreme temperatures and direct sunlight‚ which can harm the lens coatings and internal components․
Keep the lens cap securely attached when the lens is detached from the camera․ Regularly inspect the lens for any signs of fungus or haze‚ especially if stored in a damp environment․ Careful storage extends the lifespan and maintains the optical performance․
Avoiding Damage
Protecting your Canon FL lens from physical shock is crucial․ Avoid dropping or bumping the lens‚ as this can misalign internal elements or damage the delicate aperture mechanism․ Never force any controls; smooth operation indicates proper function․ Shield the lens from harsh chemicals and cleaning solutions not specifically designed for optics․
Be cautious when mounting or removing the lens from the camera body‚ ensuring a secure and gentle connection․ Regularly check for loose parts and address them promptly to prevent further complications and maintain optimal performance․
Adapting FL Lenses to Modern Cameras
Adapters allow using Canon FL lenses on EOS bodies‚ but require careful selection․ Compatibility isn’t guaranteed‚ and some features like aperture control may be limited or lost․
FD to EOS Adapters
FD to EOS adapters are crucial for mounting these classic lenses onto modern Canon digital cameras․ Several types exist‚ ranging from simple‚ inexpensive mechanical adapters to more sophisticated models with aperture control rings․
Basic adapters allow full mechanical compatibility but require manual aperture adjustment on the lens itself․ Adapters with aperture control rings enable adjustments from the camera body‚ offering convenience․ However‚ these often introduce some light loss․
Ensure the adapter is specifically designed for Canon FD lenses; compatibility issues can arise with poorly made adapters․ Consider adapters with focusing aids for easier manual focus․
Adapter Considerations
Choosing the right adapter involves balancing cost‚ features‚ and potential drawbacks․ While inexpensive adapters offer basic functionality‚ they lack aperture control from the camera body․ More expensive options with control rings provide convenience but can reduce light transmission․
Consider build quality; a robust adapter ensures a secure lens mount․ Look for adapters with a smooth focusing helix for precise adjustments․
Be aware that some adapters may not fully support all EOS camera features‚ like image stabilization․ Research compatibility with your specific camera model before purchasing․
Potential Compatibility Issues
Adapting FL lenses isn’t always seamless․ Some EOS bodies may exhibit limited functionality with certain adapters‚ particularly regarding exposure metering․ Full compatibility isn’t guaranteed‚ and older lenses lack electronic communication․
Potential issues include inaccurate exposure readings‚ requiring reliance on external light meters or the Sunny 16 rule․
Certain features‚ like image stabilization‚ may be disabled․ Verify adapter compatibility with your specific EOS camera model before investing‚ and research user experiences online․
Troubleshooting Common Issues
Common problems with Canon FL lenses include soft images‚ focusing difficulties‚ and aperture malfunctions․ Careful inspection‚ cleaning‚ and adapter verification are crucial for resolution․
Soft Images
If images appear unsharp‚ several factors could be at play․ First‚ meticulously check focus accuracy – manual focusing requires precision․ Ensure the lens elements are clean‚ as dust or smudges significantly degrade image quality․
Verify proper adapter fit if using one on a modern camera; a loose or incorrect adapter introduces instability․ Lastly‚ confirm the aperture is set correctly‚ as a stopped-down aperture can exacerbate softness if the lens isn’t performing optimally․
Consider testing with different apertures to isolate the issue․
Focusing Problems
Difficulty achieving sharp focus is common with manual lenses․ Ensure sufficient light for clear viewing through the viewfinder․ Practice zone focusing and hyperfocal distance techniques to expand the in-focus area․
If using an adapter‚ confirm it doesn’t introduce play or wobble‚ hindering precise adjustments․ Regularly check the focus ring for smoothness; stiffness can indicate internal issues․ Remember‚ slight movements have a significant impact‚ so slow and deliberate adjustments are crucial for accurate focusing․
Aperture Issues
Aperture problems often manifest as consistently over or underexposed images‚ or an inability to achieve the desired depth of field․ Verify the aperture ring is correctly set before each shot․ If the aperture blades appear sticky or oily‚ it indicates a need for professional cleaning․
Ensure the aperture is fully opening and closing when operated․ A malfunctioning aperture can lead to soft images and inaccurate exposure readings‚ impacting overall image quality․
Advanced Techniques
Exploring creative possibilities with FL lenses involves utilizing extension tubes for macro work and mastering depth of field control․ These techniques unlock unique artistic expression․
Using Extension Tubes
Extension tubes are essential accessories for close-up photography with Canon FL lenses‚ allowing significantly increased magnification without sacrificing optical quality․ These tubes fit between the camera body and the lens‚ reducing the minimum focusing distance․
Importantly‚ extension tubes contain no optical elements‚ thus preserving the original lens’s sharpness and contrast․ However‚ using extension tubes reduces the total light reaching the sensor‚ necessitating wider apertures or slower shutter speeds․ Careful metering is crucial․
Different lengths of extension tubes offer varying degrees of magnification․ Experimentation is key to achieving desired results‚ and remember to recalculate exposure settings accordingly․
Close-Up Photography
Canon FL lenses‚ when paired with appropriate accessories‚ excel in close-up photography‚ revealing intricate details often unseen by the naked eye․ Utilizing extension tubes is a cost-effective method to reduce the minimum focusing distance‚ enabling higher magnification without compromising image quality․
Precise manual focusing becomes paramount at close ranges‚ demanding careful attention to detail․ Depth of field narrows dramatically‚ requiring strategic aperture selection to control the area in focus․
Consider using a tripod for stability‚ especially in lower light conditions․ Experiment with lighting to highlight textures and forms‚ and embrace the creative possibilities of macro photography․
Creative Depth of Field
Canon FL lenses offer extensive control over depth of field‚ a crucial element in artistic expression․ Wider apertures (smaller f-numbers) create shallow depth of field‚ isolating subjects against blurred backgrounds – ideal for portraits and emphasizing specific details․
Conversely‚ smaller apertures (larger f-numbers) yield greater depth of field‚ keeping more of the scene in focus‚ perfect for landscapes or group shots․ Mastering aperture control allows photographers to direct the viewer’s attention and convey mood․
Experiment with different apertures to understand their impact on your images․
Resources and Further Learning
Online forums and Canon FD lens websites provide valuable information‚ user experiences‚ and repair guidance․ Books offer in-depth technical details and historical context for these lenses․
Canon FD Lens Resources Online
Numerous online communities are dedicated to Canon FD and FL lenses‚ offering a wealth of knowledge from experienced users․ Websites like FD Gallery and various photography forums host detailed discussions‚ repair guides‚ and user reviews․ These platforms are invaluable for troubleshooting‚ identifying lens variations‚ and learning advanced techniques․
Scoredle‚ while primarily a Wordle tool‚ demonstrates the power of online resources for analyzing data – a skill applicable to understanding lens performance․ Exploring these digital spaces allows photographers to connect‚ share experiences‚ and deepen their understanding of these classic lenses‚ supplementing any physical user manual․
Books and Guides
While dedicated manuals for Canon FL lenses can be scarce‚ broader guides covering the Canon FD system often include relevant information․ Searching for vintage photography books focusing on Canon SLR systems is a good starting point․ These resources frequently detail the mechanics of manual focusing‚ aperture control‚ and exposure metering – skills essential for using FL lenses effectively․
Understanding the exposure triangle‚ as discussed in various photography resources‚ is crucial․ Adapting strategies from problem-solving approaches‚ like those used in games such as Wordle‚ can refine your technique and improve results․
Online Communities and Forums
Numerous online forums and photography communities are invaluable resources for Canon FL lens users․ Websites dedicated to vintage lenses and classic cameras often host discussions‚ troubleshooting advice‚ and user experiences․ Sharing your questions and learning from others’ successes – and failures – can significantly accelerate your understanding․
These platforms often feature detailed analyses‚ similar to a “WordleBot” approach‚ breaking down lens performance and offering iterative refinement strategies․ Exploring these resources fosters a collaborative learning environment‚ enhancing your photographic journey․
Wordle Strategy Integration (Relevant to Problem Solving)
Like Wordle’s “Hard Mode‚” using FL lenses demands iterative refinement․ Each shot is a “guess‚” metering and focusing adjusted based on observed results‚ mirroring analytical feedback․
Applying Hard Mode Principles to Lens Usage
Wordle’s Hard Mode forces players to utilize all revealed information in subsequent attempts; similarly‚ mastering a Canon FL lens necessitates consistently applying learned settings․ Initial focus and exposure readings aren’t discarded‚ but refined with each shot․ If a test exposure is underexposed‚ the aperture is adjusted – a direct application of the “must use hints” principle․
Ignoring prior results (like ignoring green/yellow letters in Wordle) leads to inefficient shooting․ Each adjustment builds upon the last‚ progressively honing the image․ This disciplined approach‚ mirroring strategic guessing‚ ultimately yields sharper‚ better-exposed photographs‚ just as consistent application of clues solves the Wordle puzzle․
Iterative Guessing and Refinement (Similar to Focusing)
Manual focusing with a Canon FL lens mirrors Wordle’s iterative guessing․ Initial focus attempts are “guesses‚” assessed by critical observation – much like evaluating Wordle letter placement․ Slight adjustments are then made‚ refining the focus based on the viewfinder’s clarity․ This process isn’t a single action‚ but a series of small refinements․
Each tweak is a new “guess‚” bringing the image closer to sharpness․ Just as Wordle players analyze feedback‚ photographers assess focus accuracy․ This continuous cycle of adjustment and evaluation‚ mirroring the game’s logic‚ ultimately achieves precise focus‚ resulting in a clear and detailed image․
Analyzing Feedback (Interpreting Meter Readings)
Interpreting a light meter reading with a Canon FL lens is akin to analyzing Wordle’s color-coded hints․ The meter provides “feedback” – underexposure‚ overexposure‚ or correct exposure – guiding aperture and shutter speed adjustments․ Just as Wordle reveals letter accuracy‚ the meter indicates exposure correctness․
Understanding this feedback is crucial․ A reading suggests necessary changes‚ prompting iterative adjustments until the meter confirms proper exposure․ This analytical process‚ similar to refining Wordle guesses‚ ensures well-exposed images‚ demanding careful observation and informed decision-making․